Recipe: Honeybush Hazelnut No-Bake Cheesecake
by Abby Morrison
November 02, 2021
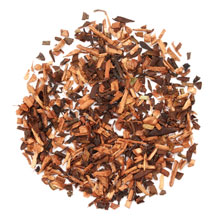
Honeybush is an African red tea with a flavor similar to rooibos, though a little sweeter. As a tea, it's a caffeine-free alternative to black teas that holds up well to rich, sweet, or fruity flavors.
As a cheesecake flavor, especially paired with chocolate and the nutty tones of hazelnut, it's unstoppable. Move over, pumpkin spice. It's time to say hi to Honeybush Hazelnut cheesecake.
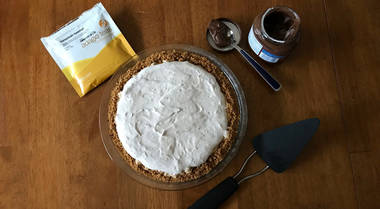
In addition to being delicious, this recipe is also simple, making it the perfect no-hassle dessert for dinner with friends, Thanksgiving, or even just dinner at home. If you have an electric mixer, a pie pan, and a few standard kitchen ingredients, you're more than halfway there. Pick up a Jell-O no-bake cheesecake box mix, and you're on the home stretch.
To begin with, we'll start by steeping our tea in the milk. To help make sure there's Honeybush flavor in every bite, we encourage you to take a page from Matcha's book, and start by grinding your tea. Don't have a way to grind it? Check out our gritTea tea grinder. Once you've ground your tea, warm your milk over medium heat, add the tea, and let it steep for a few minutes. Move it into the freezer next, so that the tea can continue to steep as it cools.
The next step is to make the crust. For this recipe, we swapped out brown sugar (a great addition to Honeybush Hazelnut on its own, by the way) for white sugar and added some extra raw tea to the mix, just to really amp up the flavor. As another tip, you can also mix your crust in the same pan you used to heat your milk to draw in any remaining powdered tea (also helpful in pre-cleaning your pan a bit, too). Once the crust is mixed, press it across the bottom and sides of your pie pan and move onto the filling.
For the filling, you'll want to make sure your tea milk mixture has sufficiently cooled before mixing. You'll also want to strain it as you add it to the filling mix to make sure any larger tea pieces are removed. Then, simply mix as instructed on the box before spooning over your crust. Put your cheesecake in the fridge for an hour to allow it to set.
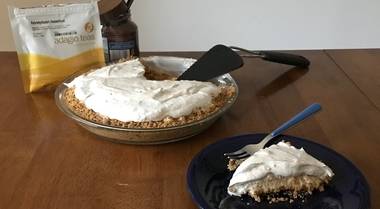
While you wait, you can whip up your hazelnut spread whipped topping. To do so, mix two large spoonfuls of hazelnut topping into an 8oz tub of Cool Whip. We suggest letting the Cool Whip sit out for a bit if it's been in the freezer to keep the spread from clumping up too much from the cold. You can add more hazelnut spread if you like (it's tempting, we know), though we suggest not going too heavy on it so the cocoa in the spread doesn't overpower the hazelnut flavors and the tea. Put it back in the fridge to firm up again, then spread over your cheesecake once it's set.
And there you have it! An easy-to-make, super tasty no-bake cheesecake. Bon Appetit!
Honeybush Hazelnut No-Bake Cheesecake Recipe
This no-bake cheesecake combines the warm, nutty flavors of Honeybush Hazelnut with the creamy sweetness of a no-bake cheesecake and a chocolate hazelnut whipped topping. A perfect easy dessert for Fall.Makes: 1 cheesecake
Time to make: ~80 minutes (including chill time)
Ingredients
3 tsp. Honeybush Hazelnut, ground1 heaping tsp Honeybush Hazelnut
1 package Jell-O No Bake Classic Cheesecake mix
2 tbsp. brown sugar
4 tbsp. melted butter
1 1/2 c. milk
8oz Cool Whip
2 large spoonfuls of hazelnut spread (to taste)
Instructions
For the cheesecakeWarm milk on stove-top over medium heat.
Add 3tsp of ground Honeybush Hazelnut tea to the milk, stirring until steeped/combined.
Put tea and milk mixture in freezer to cool.
Combine crust mix, melted butter, brown sugar, and remaining Honeybush Hazelnut tea. Press onto bottom and sides of pie plate.
Once the tea milk mixture is cool, strain and add to filling mix. Beat per box instructions.
Spoon filling over crust and put in fridge for one hour to set.
For the topping
Let cool whip stand until no longer frozen.
Mix hazelnut spread into topping to taste. Two large spoonfuls is suggested to avoid overpowering the tea and hazelnut flavors.
Put back in fridge until the cheesecake is done.
Spread over top of cheesecake.
Enjoy!