Matcha Tea Powder Mummy Cake Recipe
by Abby Morrison
October 12, 2021

If you're looking for ideas, have we got a tricky tea treat for you.
Matcha Mummy Cake
Want to make your own? Here's how.
Supplies
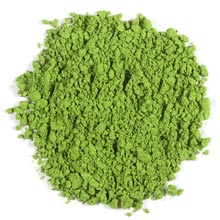
- Cake ingredients *- 2 tablespoons of Matcha**
- Buttercream frosting
- Vanilla for frosting (optional)
- Raspberry jam
- 2 eight-inch cake pans
- Wire rack
- Spatula or knife
- Decorating bags or Ziploc bags
- Large flat petal decorating tip
- Additional decorating tips (optional)
- Cake plate/carrier (optional)
* I used a white cake box mix for mine, but there are plenty of great matcha cake recipes out there if you're looking for something healthier or more hands-on.
** You could also use one of Adagio's other flavors, such as chocolate, blueberry, peach, raspberry, cinnamon apple, or jasmine. Just note that some of the flavored matcha might take on some of the coloring from their flavors, so if you want that really striking green, traditional works best.
Step 1
Make the cake batter according to your favorite recipe, sifting the matcha powder in when you mix the dry ingredients. Make sure the matcha is well incorporated before adding the wet ingredients to avoid streaks.Step 2
Pour the batter into the pans, baking according to the directions.Make sure to butter the bottom and sides according to the directions for your pans. I added parchment paper to the bottom of my pans as well, to be extra careful.
Step 3
Remove the cakes from the pans, letting them cool completely.I put mine on a wire rack to cool them faster. If you do not let them cool completely, the frosting will run.
Step 4
Stack the cakes, putting a layer of raspberry jam and frosting in between.
When I made mine, I put the frosting down first, then layered the jam on top. This helped me not to mix the two layers, but also made the layers slide a little when the cake was at room temperature. Layer carefully, with jam on the bottom!
Step 5
Place buttercream frosting into a decorating bag with a large, flat petal tip.If you want to mix any vanilla into your buttercream, do so before putting it in the bag. For the tip, I found a petal tip worked best. I specifically got one without any indents or tapering to get more even wraps on my cake.

Step 6
Starting with the top, pipe wraps onto your cake.For mine, I did a fairly uniform pattern, sometimes curling the wraps up or down to look like they were tucked into other layers, but you could do this as neatly or messy as you like. Note that by doing the top first, you can drape them down the sides, where the side layers will cover up any loose ends.
Bonus tip: Depending on how you do the eyes, you may want to put them down first. For example, if you make matcha cookie eyes, you could ice those first and place them where you like before piping layers of frosting over and around them. The same would apply if you were using Oreos, sugar eyes (you can find them in the cake decorating section of your local craft shop, though depending on the size, you may want to use them for cupcake-sized versions of this project instead), or anything else you may want to pipe over. For my design, since I was piping the eyes over the frosting, this wasn't necessary.
Step 7
Add wraps to the side of the cake.Again, this can be as clean or messy as you like. Try overlapping layers, having drooping wraps, or other strategies to make this cake look like a real fright! And, since the matcha cake underneath is so beautiful, if a little bit of cake or jam shows, no problem!
Step 8
Add the face.This step is optional. If you want a more elegant cake, try using a larger piping tip for wider wraps, do fewer dangling or overlapping wraps, and don't add a face.
But if you really want to go for the cute or scary factor, this is your time to shine.
For mine, since I was basing it off of the mummy Mii Kun from the manga/anime How to Keep a Mummy, this step was very simple. All I had to do was dye some frosting black and add some eyes, but you can go as intricate or scary with this as you like. Try adding a jack-o-lantern face, raspberry jam eyes, a toothy smile, or a wagging raspberry jam tongue. It's really up to you!
Step 9
Enjoy!Eat your cake as soon as it's done or keep it in the fridge for later. Note that if you're using food coloring for the face/other decorative elements, it might run a little if you don't eat it fairly quick. If need be, try chilling the cake to help avoid this problem or wait until your event is almost starting to add those last-minute details.
Variations to try
Alter the outside: Not a fan of mummies? Try making a ghost, vampire, zombie, or any other kind of green and white critter instead. Not a fan of frosting? Try fondant for more precise shapes. Or, if you want to make this cake for another season, make a snowy landscape, use matcha to dye your frosting for a grassy spring scene, or use any other combination of colors to suit your fancy.
Change the cake shape: I used two eight-inch pans for this, but you can change the diameter or height of your cake by changing up the pans. Or, if you'd rather make an entire scene (perhaps a graveyard?) consider using a sheet cake pan. Cupcakes can make cute individual servings too.
Add a surprise. Hollow out the center of your cake and add fresh fruit or another tasty surprise to give your guests an extra treat!
So, what do you think? If you make your own, show us on Facebook or Twitter @adagioteas. Or, if you have a cake recipe you'd like to share (with matcha or any other kind of tea), submit it on TeaChef and let us know!