by Abby Morrison
February 04, 2020
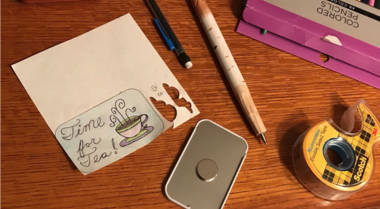
Life is full of happy moments. Weddings, birthdays, vacations, or even just enjoying a cup of your favorite cup of tea.
But when you're looking for a way to commemorate and celebrate these moments, ways beyond selfies, a new photo album, and birthday cards, what can you do?
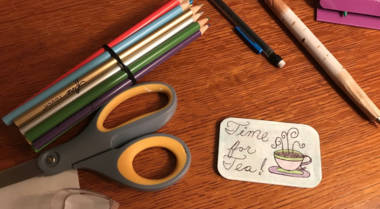
Have we got an idea for you! Introducing: Tea Tin Magnets.
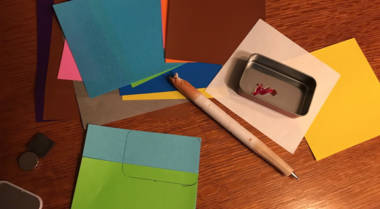
Materials
Empty Adagio sample tea tin
Magnets
Paper or photos for the back
Double-sided tape
Glue: hot, all-purpose, or super
Optional: glitter, sequins, beads, sand, clay, paint, or other decorative crafting supplies
Optional: file for the smooth part of the tin
Build Time: 10 minutes +
Instructions
Step 1
Using your empty tea tin as a stencil, trace out the shape you'll need to fit in the back of your tea tin, either on a photo or decorative paper. Cut your paper or photo out, using tape or glue to connect multiple pieces as needed.
-
Bonus tip: Not sure where you want to cut? Consider tracing the edge of the tin on a blank piece of paper and cutting the shape out to create a stencil frame. Overlay the frame on whatever you want to cut until you're happy with the picture inside, then make your final tracing and cut away!
Step 2
Use double-sided tape to attach the cutout to the inside of the tea tin.
Step 3
Attach the magnets to the back of the tea tin. For this project, we used heavy duty neodymium discs, but you can use smaller versions or weaker magnets depending on what you need.
-
Bonus tips
If your fridge, or wherever else you intend to put the magnets, is prone to scratching, be careful not to use a magnet that is too strong or sharp-edged.
Make sure to account for the weight of the tea tin and whatever you decide to put in it when choosing the appropriate magnet strength.
As with all projects involving magnets--especially heavy-duty ones--be careful to keep them away from electronics.
Make sure that the adhesive you use is appropriate for the job. While double-sided tape works great to put photos in the tea tin's back, something more heavy-duty like a hot, all-purpose, or super glue might be more appropriate to the magnets or inner decorations. Use a file to create a rougher surface on the tea tin if you need extra grip before applying, and always remember that wet glues can cause warping or lumps depending on where and how you use them. Choose wisely!
Step 4
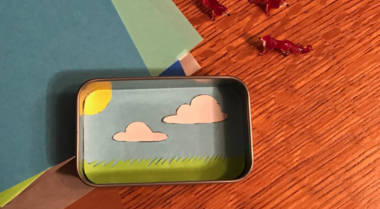
Add any additional decorations or supplies to the inside of your tea tin.
-
Bonus tip: If you're looking for ideas of what to add, consider using layered paper, miniature origami, rhinestones, sequins, sand, glitter, ribbon, or paint. Bead stores will also often have beads or charms shaped like animals, symbols, emojis and more if you're looking for something small, and papercrafting stores often carry stickers--including lettering--small enough to fit.
Step 5
Repeat the process on the tea tin lid.
Step 6
Share your results! We'd love to see your magnets on social media (@adagioteas) and we're sure your friends would too. The possibilities are endless. Show us what you've got!
CrafTEA Ideas
Landmark moments: If you've just gotten back from that long-awaited Hawaii vacation, why not put a few pictures of your trip inside your tea tin or on the lid? Use stickers, tiny bottles of sand, or other related charms or beads inside the tea tin to really set the mood, and create more for birthdays, graduations, weddings, and more as your memory (and tea tin) collection grows!
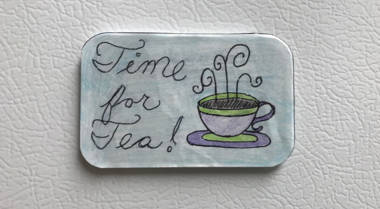
Abstract art: If you're just looking for something pretty to spice up your fridge, consider doing more abstract designs. Adult coloring books, zen doodles, watercolors, small paint by numbers, or decorative paper or fabrics are all great options to fit inside your tea tin.
Seasonal: Love the changing of the seasons? Want a way to keep your kitchen fresh? Make a few tins for each season, perhaps highlighting favorite holidays, weather, important dates, or seasonal memories and rotate them out as the year goes by.
Diorama: If you're looking for a more 3D effect, try folding your paper to stand out from the tea tin's back. You can also print or back your images or shapes on foam core to add a little depth before gluing. Alternatively, layer thicker or more textured papers or fabrics on top of each other for a more subtle effect.
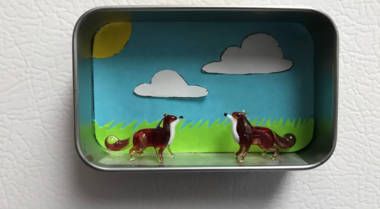
Collection displays: Have a collection you want to put on display, such as tiny glass animals, D&D minis, origami, Lego mini-figs, coins, or magic beans? Consider creating a display magnet for each. Switch things up by putting in different backgrounds or decorations--or even just by rotating the magnet orientation--for each tea tin or make generic cases where you can simply switch out the contents. It's up to you!
Fandom blends: Really love the artwork on your latest sample tea tin? Want to decorate your fridge with all things anime or video games? Save time by simply attaching magnets to the inside of your tea tin lids and use them as is!
More Tips
Gifts: If you're looking for a unique handmade gift to mark a special occasion, considering making a tea tin magnet for your friends or family. Put in photos of you and your loved one; a one of a kind design; a favorite theme, animal, quote, scripture, phrase, or fandom; or anything else you think they would love. As a bonus, if you're buying them tea samples of their own, consider turning the tea tin(s) into a magnet or two and store the tea itself in a cute decorative jar alongside. Make several from multiple tea tins, and you'll have a gift box they're sure to adore.
Shop displays: Own a shop or run booths at cons or craft fairs? Consider using tea tin magnets to organize your space. Put labels or pricing details on your magnets, get some metal sheets or objects to place around your table, and you'll have a modular system for setup that you can take anywhere.
Selling items: Want to really take things to the next level? Make tea tin magnets to sell. Because they're easy and fun to make, as well as useful, we're sure they'll be a hot ticket item. Just make sure that any fandom art you didn't make is covered to make sure all artists always get their due.
Tea organization: Fall in love with a favorite blend after you got the tea sample? Looking for a way to organize your tea collection? Consider making magnets out of the lids of favorite blends, artwork facing out, and attach them to Adagio storage tins, metal backsplashes, or displays. Label the back of the magnet with brewing instructions or blend names to make prep and re-ordering a breeze, and you'll always have the right cup on hand!